Each day I want to take a healthy, plant-based lunch to work. Lunch is my main meal of the day, after a big breakfast, and virtually no dinner. So I don’t want so skimp out on making something hearty, tasty, and delicious! But, those time constraints!
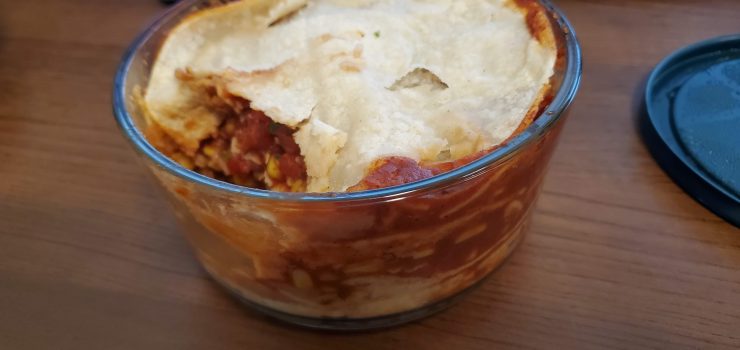
So, again, in my typical “how-to” fashion, here’s an incredibly simple, but incredibly tasty, how-ya-do-it, as fast as making a sandwich, in a 4-cup Pyrex bowl.
Easy dish for one for homemade lunches with a Mexican flair!Last updated August 8, 2019.
Prep Time10 minutesmins
Cuisine: Mexican
Keyword: lunch
Author: Plant-Based-Bear.com
Equipment
6" Pyrex Bowl
Ingredients
5corn tortillas
1canno-oil refried beans
2cupscooked riceany variety
1small canenchilada sauce or tomato sauceseasoned as you desire
pico de gallo or salsaoptional
bell peppersdiced, optional
plant-based cheese or cheese sauceshredded, optional
plant-based sour creamoptional
Instructions
If using tomato sauce, prepare with some spices and seasonings that suit you. A little chili powder, salt, and diced bell peppers such should make it more exciting! No need to heat it, unless you want to heat up the bell peppers into the sauce to better spread flavor. Green chilies would work here too!
Add a little of the enchilada or tomato sauce (the sauce) to the bottom of the bowl. This is mostly so the tortilla doesn't want to stick!
Add a corn tortilla, flat in the bottom of your Pyrex bowl. It might be slightly larger than the bowl. These are usually naturally oil-free, and are shelf stable for a long time.
Layer refried beans (I do mine in clumps), rice, salsa, peppers, and more sauce. Add plant-based cheese or sauce in each layer, if desired.
Add another corn tortilla and repeat until the bowl is filled. I like to end with a corn tortilla on top, so things don't stick to the lid.
When time to eat, heat 4-6 minutes in the microwave. This is thick and heavy, so it takes awhile to heat. Bowl will be hot when removing from microwave.
Top with plant-based shredded cheese and sour cream!
Notes
Use a glass Pyrex bowl, as tomato-based sauces and plastic bowls don’t really work too well. We also need some depth here.Because of splattering, use some sort of lid or paper towel. Don’t use the plastic Pyrex lids, as they’ll often melt and misshape with that much microwaving. I eat at the office, so can usually find a paper plate or paper towel to cover during cooking!
In my Deep Dish Enchiladas for today, I had some corn I wanted to use up, and some pico de gallo. A dollop of quacomole would’ve been great, and the shredded cheese or sauce would have been nice too, but I didn’t have any fresh in my fridge. Nonetheless, these enchiladas really hit the spot and were amazing. Also, it’s hard to “overnuke” these in the microwave, as that seems to give them more of a “baked” consistency.
Yeah, I don’t know if I can really call these “enchiladas,” as I don’t know the first thing about authentic Mexican cuisine (except how to eat it!), but, they do use the same basic ingredients, I think, so I’m sticking with it! Don’t like it? Comment below!
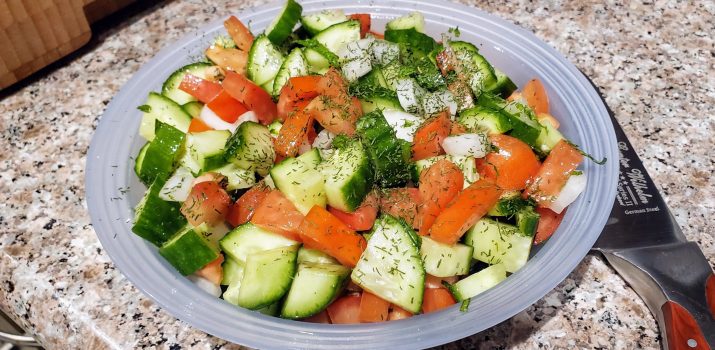
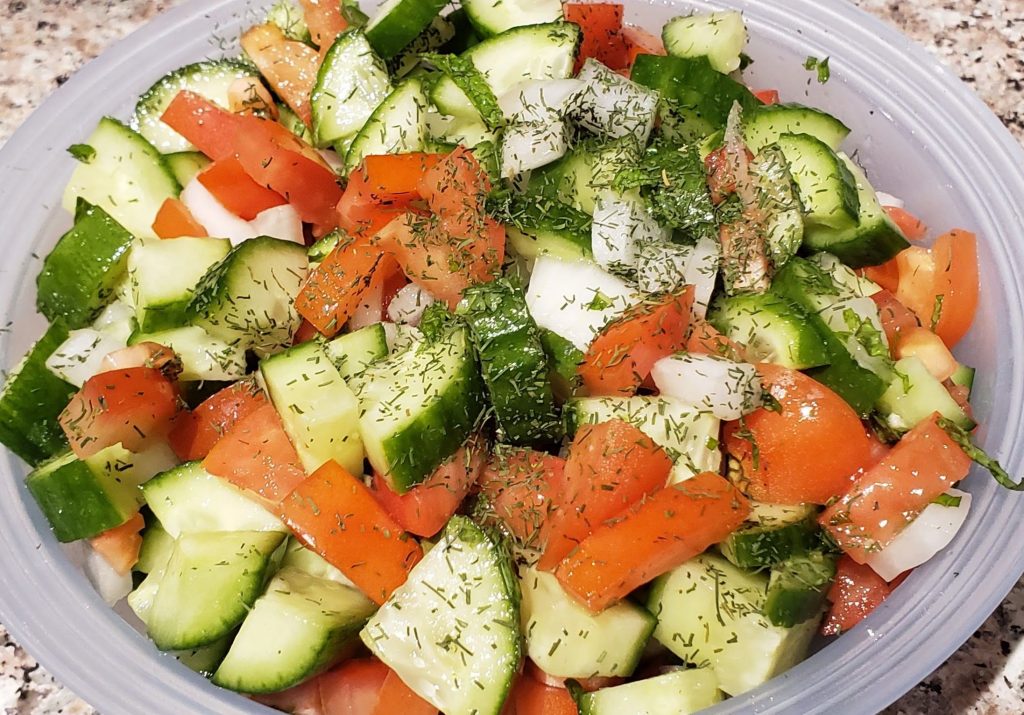
A simple salad, just like the title says!Last updated August 7, 2019.
Prep Time10 minutesmins
Cuisine: Mediterranean
Keyword: salad
Author: Plant-Based-Bear.com
Ingredients
cucumberschopped
tomatoeschopped
oniondiced, almost any variety will do
fresh dillfinely chopped, optional
fresh mintfinely chopped, optional
lemon or lime juicefresh is best!
pinchgarlic or sea salt
Instructions
Chop up some cucumber. I tend to like the Persian cucumbers for this, but I will be making it in the next few days with some huge hothouse cucumbers I got on sale. I like big servings, but have found that about 2 larger Persian cucumbers, or ⅓ to ½ of a large hothouse cucumber is about a serving.
Chop up some tomato. Usually I have some Roma tomatoes, as they're often cheap, but anything will do. I use 2 small tomatoes or one large, so I have about 80% as much tomato as cucumber.
Dice the onions. Works great with green onions from the whites to the green, or yellow or white onions, too.
Finely chopped the mint, or dill or whatever green, fresh herbs you might have around, and sprinkle on top. Sometimes if I don't have fresh dill, just dried will work great as well!
Add a pinch of garlic or sea salt.
Put a strong splash of lemon or lime juice all over the top.
Mix it all up, and store in fridge until ready to eat!
Notes
This is one of those salads that seems to improve if you let it all “marinate” together for a bit. Making it in the morning for lunch is great!
That’s it! Super simple, and delicious, and incredible on a hot summer day!
Simple Cucumber & Tomato Salad, ready to eat. This one, I got lazy and just used dried dill!
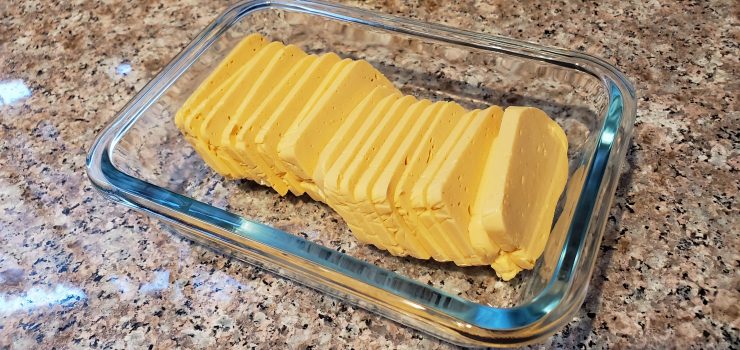
I’ve now tried several recipes for a plant-based cheese, and although I really do like my Plant-Based Sharp Cheddar recipe, I’m still on the hunt for the “perfect” plant-based cheese!
As I search through cheese recipes, most of them are variations of the same theme, which doesn’t mean I won’t try them, but I expect similar results and maybe not a solution to downsides of other recipes I’ve tried. But, this one from Michelle Blackwood over at Healthier Steps, caught my eye as it included some different ingredients that I thought might help make the cheese more firm and perhaps more, uh, cheese-like, or having the same feeling, texture, and type of cutting of a real cheddar. The tapioca starch (or flour) and the cornstarch could make it more interesting!
Recently I’ve been using this agar powder, which is about as good of a price and quality I’ve yet been able to find. It is working great in all of the other cheese recipes. However, the amount of agar (2 T) in Michelle’s recipe seems a bit high, particularly for a 1/2 cup of water. For comparison, my Plant-Based Sharp Cheddar recipes uses 1 T of agar powder to 1 cup water. I would think that Michelle just made a simple mistake and has Tablespoons, instead of teaspoons, but she does properly list 2 teaspoons kappa carrageenan as an alternative, and doubles-down on the amounts of agar powder and water in the comments when some said their cheeses were too soft.
I followed the recipe, only doubling the lemon juice, but, due to the Plant-based Bear not using oil, just skipped the coconut oil in the recipe entirely. I’m not sure how this might affect things, but the cheese turned out fine and didn’t need additional oil, at least from a non-stick angle. All was well…
…Until I started making that agar/water mixture. I couldn’t even begin to dissolve 2 T of agar powder into the 1/2 cup water, and got a gluey ball that wouldn’t at all be able to be brought to a boil. I tried adding just a SMALL amount more water, but that wasn’t enough to make a difference either. I wasn’t measuring my added water, but I’d imagine I ended up with a cup and a half of water or more to make a rather thick agar paste I could bring to a boil. I poured it into the other mixture and blended as instructed.
I have a number of “tiny loaf” pans that I use for making cheese, and instead of oiling up, I simply line them with plastic wrap, leaving excess in place, extending beyond the pan. This makes things non-stick, super easy to clean up, and I can wrap the resulting cheeses in the extra wrap. I bought my 1-cup tiny loaf pans years ago, and can’t for the life of me find any more, but this pan would also be similar. For this recipe, I can make three “loaves” of cheese.
If using a high-speed blender, add water, cashews, bell pepper, nutritional yeast flakes, lemon juice, coconut milk, coconut oil, tapioca starch, cornstarch, onion powder, garlic powder, salt, and cayenne pepper.
Process until smooth and creamy.
Mix cold water with agar powder in a saucepan, bring to boil on medium stirring constantly.
Remove from heat and immediately add to cheese sauce.
Process until smooth.
Pour mixture into an oiled container and refrigerate for at least 1 hour.
Alternatively, especially when using a regular blender, process all the ingredients including agar powder in a blender until smooth. Pour sauce into a non-stick sauce on medium heat whisking constantly until thick and bubbly. Immediately pour into an oiled container and refrigerate for an hour.
Notes
I find the consistency of the method using the high-speed blender better. This recipe is not like storebought processed vegan cheese. So it’s not as firm. Yes, it slices and shreds but not like storebought and tastes amazing!The recipe calls for agar powder, if using agar flakes, use 3 times the amount instead.If you prefer a sharper flavor then add extra lemon juice
The results were okay. I think my “pinch of cayenne” was rather large, so my cheese was a bit spicy, and it definitely was more firm than other cheese recipes (probably due to the “excess” agar.) But I didn’t find it dramatically different or better, and it still looks about the same. It’s still more of a “Velveeta” consistency, rather than a typical hard dairy cheese.
I’ll have to try it again soon, with what I’ve learned, and then maybe publish a Plant-based Bear edit!
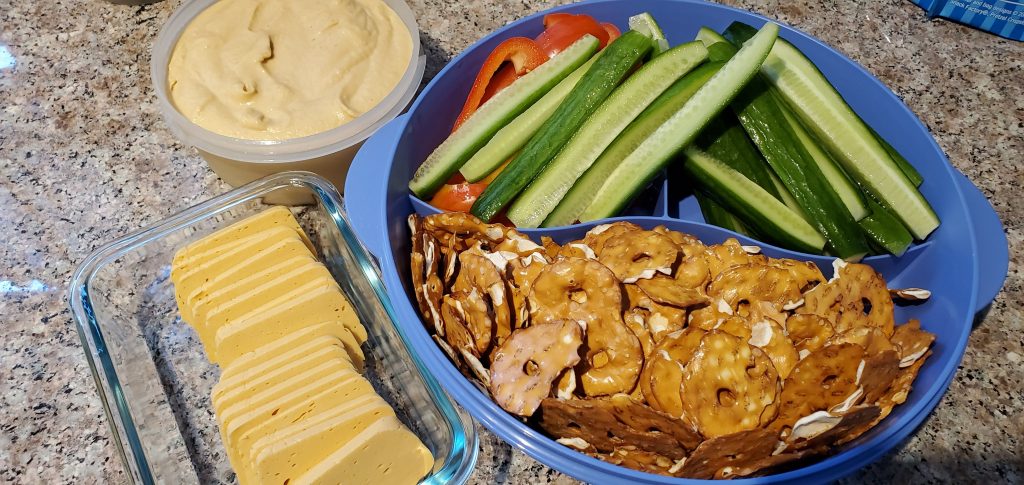
I did slice the cheese up, and pair with Pretzel Crisps, fresh veggies, and some home-made hummus to take to a get-together, and everyone loved it!
Michelle has some realinterestingthings on her site, so I do encourage you check it out if you like Jamaican, Asian, and/or Cajun flavors.