Pickle Batch

Easy Refrigerator Pickles

So, I was in a pickle… I was hungry for a snack, and wanted something crispy, crunchy, salty, low calorie, and satisfying. And cucumbers are on sale! The thing about pickles, though, they’re not an instant gratification kind of treat! But, let’s not delay! Time to make some pickles!

So far, I’ve had moderate success with pickle making, trying basics like reusing store-bought pickle brine after eating all the pickles, or just adding a bit more salt or liquid. And, I’ve used a recipe before to make refrigerator pickles, because I love refrigerator pickles!

So, here’s what I’m trying this evening. I made my own brine recipe after going through quite a few brines and trying to figure out how I wanted my pickles to taste! I go for a sour, dill pickle, and I don’t like a ton of vinegar taste, and definitely don’t like them sweet!

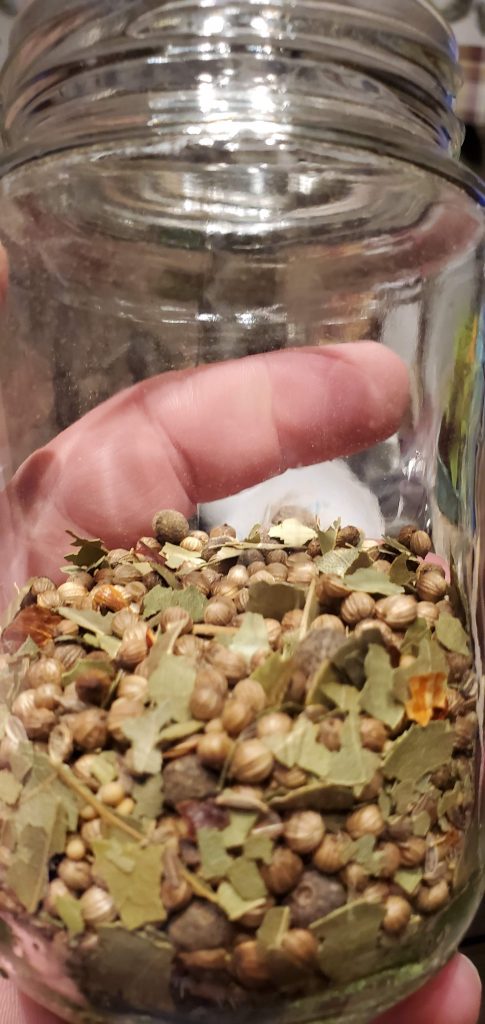
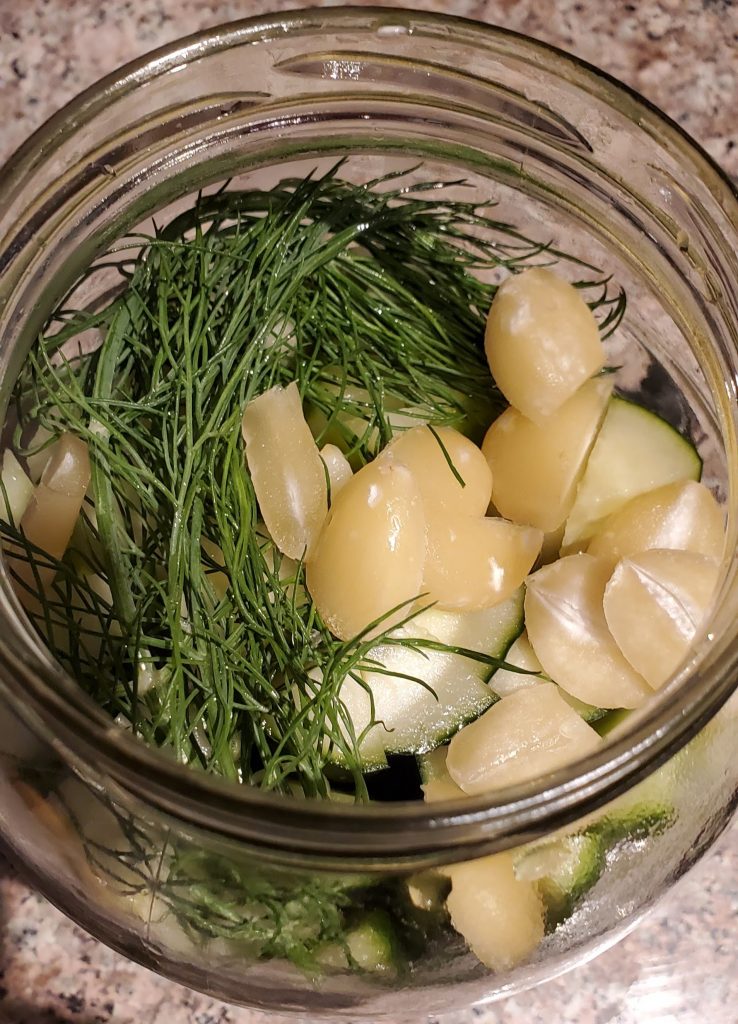
First, I got my brine going on the stove, with 4 parts water, 1 part vinegar, and 1 part lemon juice! Then I lined my pickle containers with generous amounts of rinsed, fresh dill! I tend to avoid tons of stems, so just choose the upper half of the stalks. I also added some pickling spices that I picked up in bulk. You can also add slice garlic here. I like to slice lengthwise to get lots of surface contact and still have recognizable pieces.

Quite a big dill!
Doesn’t look like that much dill, but it’s quite a lot.
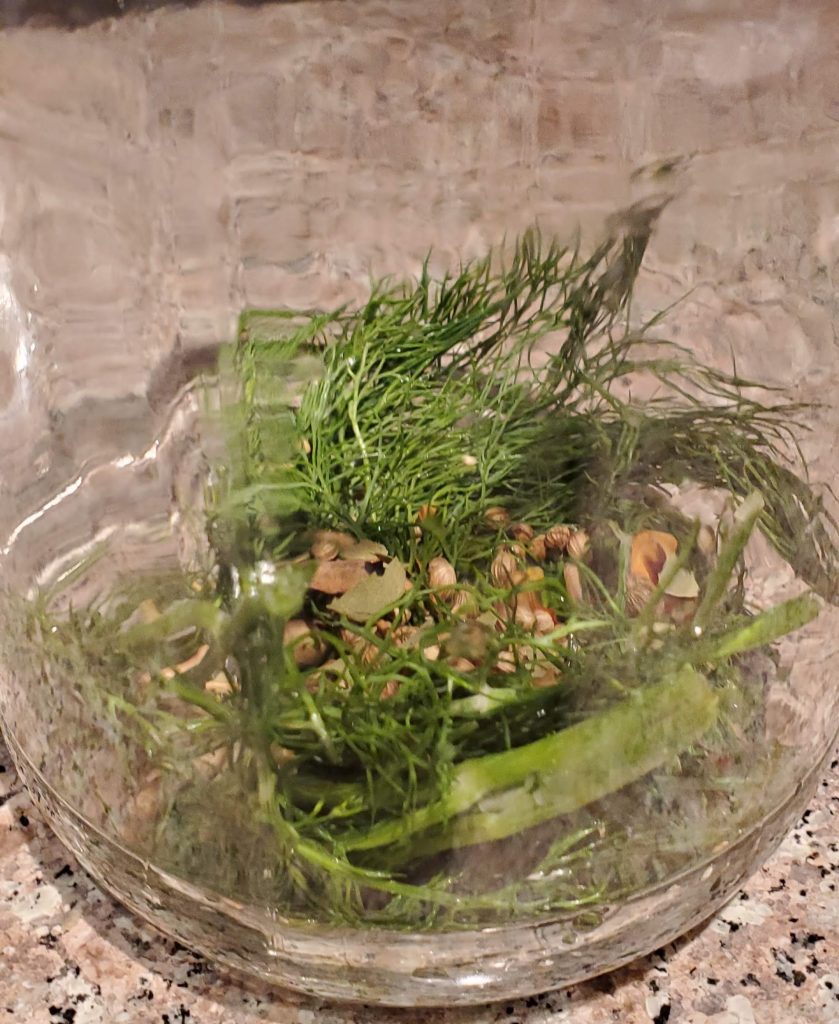
Or, as they say, quite a big dill!
Pickling mix.
My pickling mix.

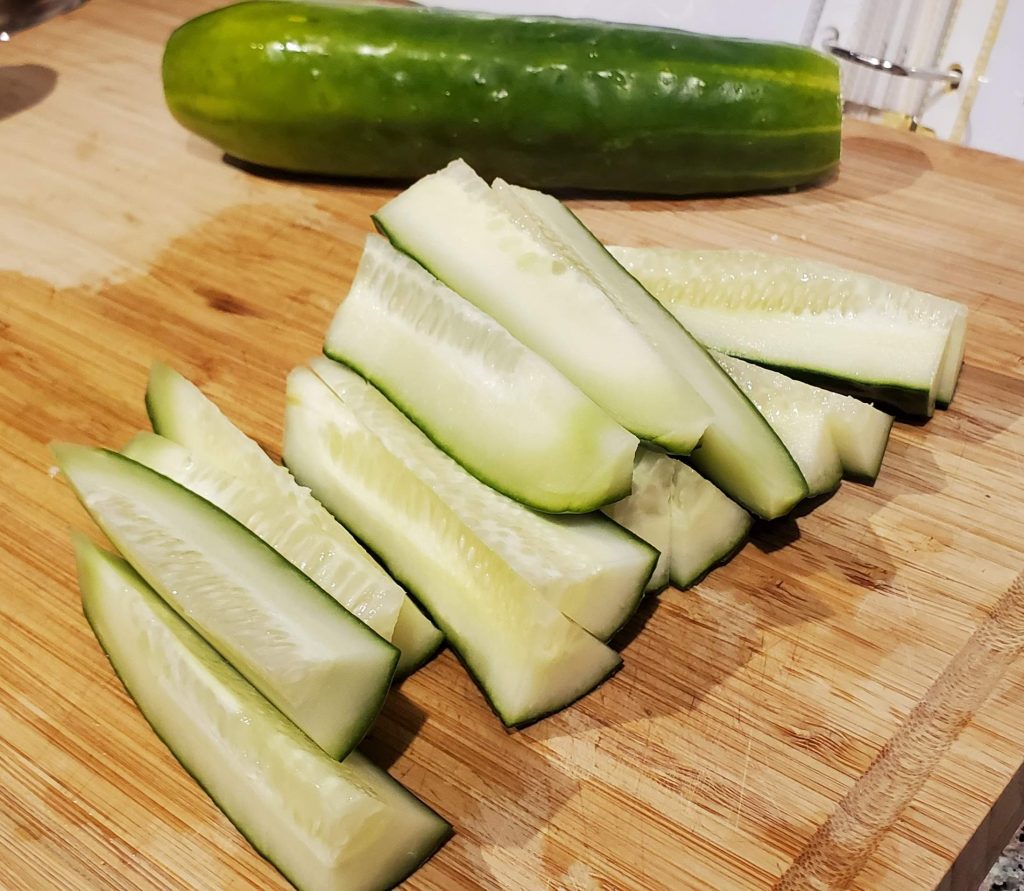
Next, since tonight I used “hot house” cucumbers, (the big waxy ones you see at the market), I first rinsed and scrubbed the cucumbers in hot, hot water to try to remove some of the wax and ensure sanitation! Pickling cucumbers work great too, of course (but tend to be more expensive), and I’ll get Persian cucumbers when they’re in season, as well. I don’t mind the hot house cucumbers at all because that waxy skin creates a nice crunch and sturdiness!

I slice the cucumbers in half, then slice length-wise in half, and finally cut each half in quarters to make spears. I’ve also tried slicing, or even tried to do some crinkle cut slicing, but apparently don’t have the right tool for that, and spears suit me just fine.

Sliced cucumber spears
Sliced cucumber spears.

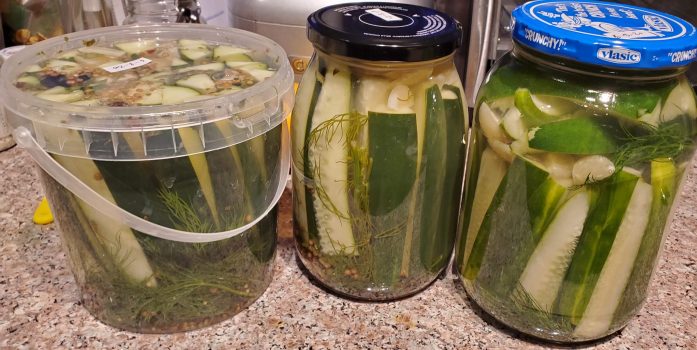
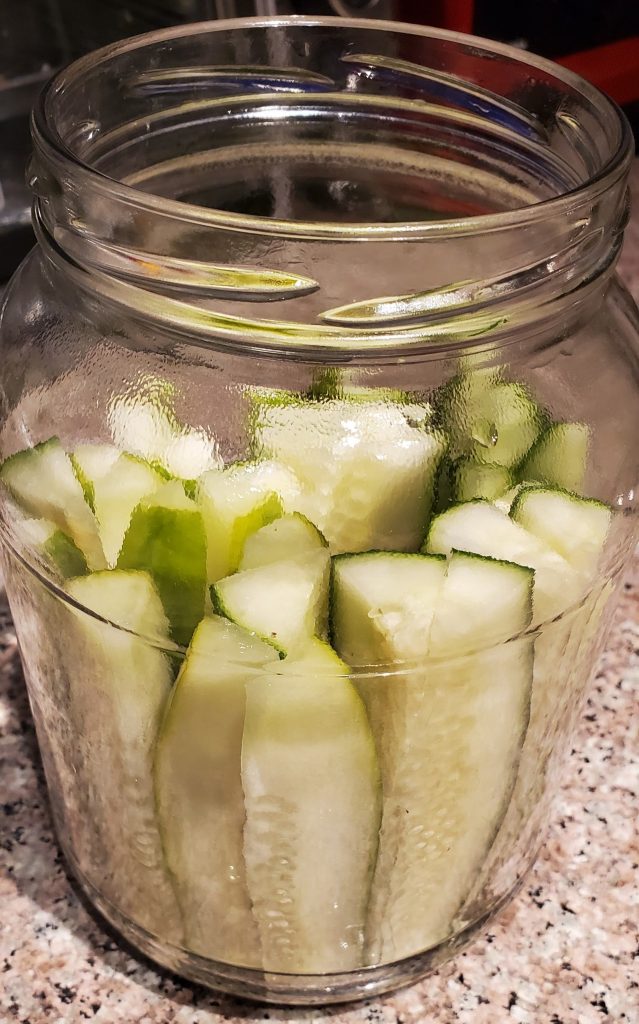
Now, I stuffed the spears into my jars and containers as tightly as I could, while intentionally not “matching” sides as much as possible, so there is room for the brine to flow!

Stuffed pickle spears.
Stuffed spears!
Pickle packing.
Add some more dill or garlic, or any other spices you may have missed earlier!

Finally, I pour the heated brine over everything, covering all cucumbers and ingredients. Pop the lid on, shakes a few times to mix up all the ingredients, and pop them in the refrigerator!

Tonight's pickle batch.
I recycle real pickle jars and containers, and they work great!
Tonight’s batch of future pickles!

Plant-based Bear’s In-Progress Pickle Recipe

Tasty, sour, dill refrigerator pickles!
Last updated June 8, 2020
Prep Time20 minutes
Cook Time5 minutes
Total Time25 minutes
Course: Snacks
Cuisine: American
Author: Plant-based Bear

Ingredients

  • 4 cups water
  • 1 cup lemon juice (bottled)
  • 1 cup vinegar
  • 2 tbsp pickling salt
  • fresh garlic cloves
  • fresh dill
  • pickling mix, or pickling spices
  • 5 large cucumbers, OR
  • 6-8 pickling cucumbers or persian cucumbers

Instructions

  • Combine water, lemon juice, vinegar, and salt in a saucepan and bring to a boil, stirring enough to dissolve salt.
  • Line bottom of jars or containers with generous amounts of dill, and desired amounts of slice garlic cloves
  • Add pickling mix or spices. I use around a teaspoon per "average" pickle jar, smaller than a large Mason jar.
    Alternatively, add desired amount of mustard seed, black peppercorns, crumbled bay leaves, and other desired spices to the bottom of the jar. People add allspice berries, coriander seeds, pepper flakes, ground ginger, broken cinnamon sticks, cloves and dill seed!
  • Add sliced garlic cloves to bottom of jar, or leave for on top. It's up to you!
  • Slice pickles as desired. and pack into containers tightly but not allowing all sides to touch. Top with more garlic or dill, as desired.
  • Pour hot or boiling brine over pickles, making sure to cover all pickles and ingredients.
  • Top jars or containers, refrigerate.
  • Recommended to give pickle jars a few mixing shakes, around once per day.
  • In about a week, snack and enjoy! Pickles last at least a month, but should not "sizzle" when opened.

In about a week I’ll report back on how these turned out, and will modify my recipe as I find the perfect pickle!

What’s your favorite kind of pickle? Or your favorite recipe? Let me know in the comments!

PBB
Cheesy Brocolli Rice Cream Soup

Cheesy Broccoli Rice Cream Soup

The winter days are waning, and it’s heating up, but there’s still just enough time for a little more comfort food – soup!

After last week’s Broccoli Chocolate Cake, I still had some broccoli left, and, I remembered that, when I was growing up, my mom used to make a delicious broccoli rice soup! Mom’s soup was undoubtedly made with dairy products, so I had to think outside the (dairy) barn!

The result was something I think is truly special, and uses some methods and skills I’ve been honing and learning about from other recipes. And, I’m pleased to say that this recipe is 100% original to the Plant-based Bear, and I’m pretty proud of it!

This soup is chock full of goodness, from whole grain rice, to carrots, onions, and, of course, broccoli!

Cheesy Brocolli Rice Cream Soup with Cashew Cream
This bowl of soup was the first I ever made while inventing this recipe, and “stirs in” the cashew cream at the end!

First, I start off with a little coconut milk, some water and several cups of veggies, like carrots, onions, and some garlic, along with just a bit of seasoning to get things going!

Carrots and onions simmer.
Carrots, onions and garlic simmer in just a little bit of coconut milk and water! I used red onions in this batch, and it simply darkens the color a bit!

Once most of the liquid has boiled off, I add a bit of vinegar, just for a bit of zest and to kind of “pickle” the ingredients. I add in a bit more water, a little more flavor, and two cups of cooked rice. Then, this soup base heads to the high-speed blender to turn creamy!

While blending, I heat up some more water, and add in everything else! And while I wait for everything to get nice and warm, I can whip up some cashew cream!

Cheesy Brocolli Rice Cream Soup
Even without cashew cream, the Plant-based Bear’s Cheesy Broccoli Rice Cream Soup is delicious!

Cheesy Broccoli Rice Cream Soup

A ridiculously creamy, whole-grain, healthy vegetable delicious hot treat!
Last updated April 20, 2020.
Prep Time20 minutes
Cook Time40 minutes
Raw cashew soaking time1 hour
Total Time1 hour
Course: Soup
Cuisine: American
Keyword: brocolli, cashew cream, Cheese, rice, soup
Servings: 8
Author: Plant-based Bear

Ingredients

Vegetable Cooking

  • ½ cup coconut milk
  • 1 ½ cups water
  • 2 cups carrots peeled and rough chopped. Roughly 4-5 medium carrots.
  • 2 cups onions rough chopped. About 1 medium-large yellow or white onion.
  • 2 to 4 cloves garlic minced or chopped
  • 1 ½ Tbsp McKay's "Chicken" Seasoning
  • ½ to 1 tsp ground cumin
  • 2 tsp white vinegar

Soup Base

  • 1 to 2 cups water
  • ½ cup nutritional yeast flakes
  • 2 cups rice cooked

Main Soup Ingredients

  • 3-4 cups water
  • 2 Tbsp corn starch
  • 3-4 cups rice cooked
  • 1 tsp seasoned salt optional or season as desired
  • tsp cayenne scant, optional or season as desired
  • tsp ground pepper scant, optional or season as desired
  • 3 cups broccoli lightly steamed, medium-fine chopped.
  • 1-2 Tbsp lemon juice season as desired, see notes.

Cashew Cream (Optional)

  • 1 cup raw cashews soaked overnight, or in boiling water for an hour
  • ¾ cup water

Instructions

Vegetable Cooking

  • In a large non-stick soup pan, add coconut milk, 1 1/2 cups water, carrots, onions, garlic, chicken seasoning, and ground cumin.
  • Cook on medium high, stirring occasionally, until liquid is almost gone.
  • Stir more frequently to cook the carrots and onions a bit more until almost dry.
  • Add vinegar, stir and cook that mostly off.

Soup Base

  • To the cooked vegetables, add 1 cup water. nutritional yeast and 2 lightly packed cups of cooked rice.
  • Stir until rice is separated, and everything is well-mixed.
  • Add entire mixture to high-speed blender.

Main Soup Ingredients

  • Before worrying about blending, return empty soup pan to stove, on high, add 3 cups cold water, and 2 Tbsp cornstarch. Mix well.
  • Blend the soup base in the high-speed blender until very creamy and smooth. If you have trouble blending, add water, 1/4 cup at a time until it easily blends, but remains thick. This may take a couple of minutes.
  • Back at the soup pan, the water should have heated to near boiling. Add 3 cups cooked rice and stir to separate.
  • Add seasoned salt, cayenne, and pepper.
  • Return soup base from blender to soup pan and stir in.
  • Add broccoli and lemon juice.
  • Season as desired.
  • Serve and enjoy. Store leftovers in a tightly covered container.

Cashew Cream (Optional)

  • To take this delicious soup from delicious to decadent, make and add some cashew cream!
  • In a high-speed blender (you don't really have to wash/scrape it out that well from the soup base), blend soaked cashews and water on high until you have a beautiful cream.
  • Stir cashew cream into the entire soup and mix, or use it to swirl into each bowlful!

Notes

2 cups of precooked rice is more than enough for this whole recipe.  Extra rice can be added for desired consistency.
Remember that cheese is often salty, so using a little extra chicken seasoning, seasoned salt, or salt-substitute than you normally might, will help add to the cheesiness!
The full amount or additional lemon juice can give things a lovely tang that works well for a cheesy taste!  More lemon juice may increase the “sharpness” of the “cheese.”
Water can be adjusted to suit the level of “soupy-ness” you require.  This soup will get thicker as it sits.  Use more water, if also using the cashew cream.
Cashew cream is completely optional, but does take this soup from delicious, to decadent!  You can just add the cream to the soup pan and stir in, or swirl in some into each bowl of soup as you prepare to serve.  If storing leftovers, cashew cream is properly best stirred into the remaining soup!

I hope this original Plant-based Bear recipe will become one that you truly enjoy. Or, if you have tips or comments, please pop them below! May your remaining winter evenings be full of something creamy, cheesy, soupy, and delicious!

PBB
No-Oil Hummus (Among Us!)

No-Oil Hummus (Among Us!)

It’ll definitely take me longer to write this recipe out for you than it did for me to whip up my latest batch of hummus in my high speed blender! Since I’ve become plant-based, I’ve made sure to have plenty of healthy snacks available, just in case I get the munchies, and to help me stay true to my ideals! So, I usually have lots of fresh fruits, frozen fruits (frozen blueberries make an amazing cold snack), raisins (that aren’t soaked in sunflower oil), and, well, hummus! I’ve bought hummus in bulk for years from Costco, but, upon inspection, it’s filled with oils and sometimes other ingredients I can’t pronounce.

So, I’ve started making my own, because it really is so easy, there’s a billion variations, and, it’s pretty cheap, too! I’ve started taking my hummus to parties and events, along with a big bowl of sliced and diced veggies, and it’s been a big hit! In fact, I’m starting to get a little bit known for it!

No-Oil Hummus (Among Us!)
Fresh No-Oil Hummus (Among Us!)

First off, I’m not picky on my chick peas or garbanzos. I’ve tried at least a dozen brands, and I’ve not seen that it makes any difference. So, now I buy canned garbanzos in bulk from Wal-Mart, which usually has a can for under $0.50 or at another local grocery store that is having a sale. I’ve also tried to take dried garbanzos and soak and cook, but I haven’t yet perfected that, and, it makes a simple tasks take hours, although I like the thrifty ideal!

No-Oil Hummus (Among Us!)
Hummus on a home-made No-Oil Corn Chip.

And, while not going to go too deep into it right now, don’t throw away that “bean juice” or “aquafaba” that isn’t needed in the recipe. You can use it in my No-Oil Whole Wheat Bread recipe and host of other things, and it makes a great substitute for eggs in certain other recipes and such. Simply freeze a jar of it, and it’ll last forever. (In fact, one of my former plastic 32 oz. jars of tahini has been repurposed into the aquqfaba freezer jar!)

Hummus is also great for so many things, other than basic “dip” snacking. I’ll often use it as a “mayo” or spread for bread, sandwiches, on salads as a dressing, and more!

So, without further ado:

No-Oil Hummus (Among Us!)

The Plant-based Bear's take on a classic, creamy, and smooth Middle Eastern dip!
Last updated Oct. 11, 2019.
Prep Time20 minutes
Course: Appetizer, Dip, Sauce/Spread
Cuisine: Greek, Lebanese, Middle Eastern
Author: Plant-based Bear

Ingredients

  • 2 15 oz. cans garbanzo beans or chick peas
  • 4-5 Tbsps sesame tahini see notes
  • 8-10 Tbsps lemon juice fresh, if possible
  • 4 cloves garlic adjust to preference
  • 1 to 1 ½ tsp salt
  • 1 tsp cumin heaping
  • ½ tsp chili powder
  • 1 tsp Frank's RedHot Seasoning Blend Powder heaping

Instructions

  • Open one can of garbanzo beans, drain and add to blender. Save aquafaba (bean juice) for later on, or other recipes. Just don't waste it!
  • Open 2nd can of garbanzo beans, drain about half (or more) of the liquid, and add to blender. See notes at bottom before you pour it all in!
  • Add 4 generous tablespoons of tahini to blender.
  • Add lemon juice to blender. Yes, 8-10 tablespoons is a lot of lemon juice! If squeezed fresh, you might use closer to 8. Bottled, closer to 10. Even more than 10 is okay, but might make hummus get more runny, so you can decrease the aquafaba in the recipe.
  • Add all other ingredients to blender.
  • Blend until smooth.
  • Pour into airtight storage container and chill before serving. (Although some warm pita bread and fresh-made warm hummus is kind of amazing, too! Just don't eat it all at once!)

Notes

Lemon juice really gives a great flavor to hummus, so if you’re worried about it getting too runny, it’s better to decrease the amount of aquafaba you’re using than to decrease the lemon juice.  Starting out with very little liquid other than the lemon juice, and adding just enough aquafaba to make it blend is a good method! And, in my opinion, it’s almost impossible to have too much lemon juice!
Get tahini at an international market and look for the jars that have as little English as possible on them. Look for “100% sesame seeds” and nothing else. Tahini, once initially stirred, should be a thick, runny liquid, not a paste.
No-Oil Hummus (Among Us!)
Freshly blended No-Oil Hummus (Among Us!)

The heaping tablespoons mentioned in my recipe just mean that I wouldn’t be stingy with the ingredients. I think you CAN overdo things like the chili powder, and even though I like garlic, 6-8 cloves is really too much! Other than that, season to your personal taste.

And then there’s Frank’s RedHot Seasoning Blend! I picked up a large jar of this one day at Costco on a close-out, and when I thought to try it in my hummus, I’ve never looked back. It really is perfect for hummus, giving it just a little zip that it needs, without making it “spicy.” You could also put a pinch of cayenne or increase the chili powder slightly, but Frank’s really does something nice to it!

Frank's RedHot Seasoning Blend
Frank’s RedHot Seasoning Blend adds the perfect bit of zip, without getting too spicy.

Finally, this is a basic recipe. I almost never make my hummus exactly like the recipe, unless I’m taking it to a party! Lots of things can be added to bring originality and a new take, such as: bell peppers, olives (green, black, and kalamata all make it amazing), fresh parsley, fresh mint, fresh cilantro, jalapenos, banana peppers, green chilies, and more. For most of these extra ingredients, I’ll blend my hummus to completion, then add my extras, blending just briefly to break them up, without pulverizing! One extra note about bell peppers: green or red give some color, but peppers are largely water-based, so might make your hummus slightly more runny. You might decrease the aquafaba in your batch at the beginning, first!

PBB