Plant-based Veggie Omelet

Plant-based Omelets (and scrambled eggs)

I’ve been wanting a good omelet for awhile. And, while I applaud the efforts of the “Just” company and their Just Egg product, it contains a lot of canola oil, several impossible to pronounce ingredients, and is rather expensive, per bottle. There had to be a better way!

Dana, over at the Minimalist Baker, came to the rescue! She also came to the conclusion that maybe she could recreate the “eggy” product from Just. But, like most things you make at home, it can take a bit of preparation. This recipe is pretty easy, and just uses a high-speed blender, but it’s the forethought needed to soak your mung beans the night before that makes it problematic for me. But, if I want omelets so bad, this really does work.

You start out with some split mung beans, also known as moong dal. During the COVID-19 pandemic, I haven’t been scouring multiple stores for ingredients, and so didn’t readily find these split mung beans. But at a Korean grocery store, I found dried peeled mung beans. These appeared to be very similar to the picture Dana had in her recipe, so I bought some.

Peeled Mung Beans
Dried Peeled Mung Beans

A rinse, an all-day soak, another rinse, and I popped them in the fridge overnight for this morning!

Then it was time for high-speed blender action, and a hot non-stick pan, and voila! Omelets!

Plant-based Veggie Omelet
Plant-based Veggie Omelet with salsa, vegan cheese shreds and a plant-based sour cream.

Plant-based Veggie Omelet
Plant-based Veggie omelet with salsa, vegan cheese slices, salsa and plant-based sour cream.

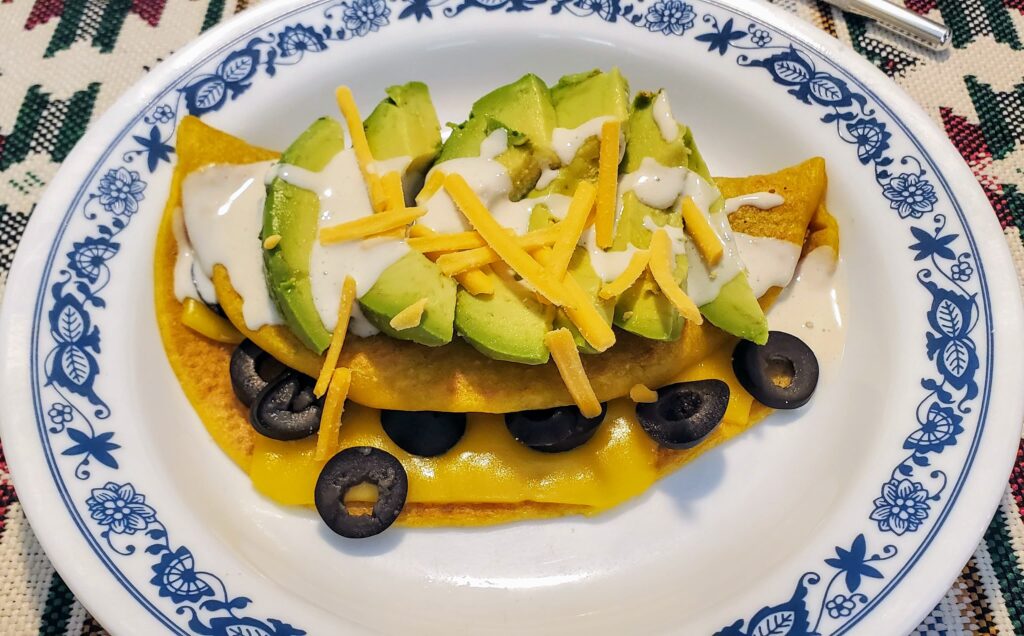
Best I can tell, you can call something “California”, if you simply add fresh avocado! So, without further ado:

Plant-based "California Omelet"
Plant-based “California” Omelet with plant-based sour cream.

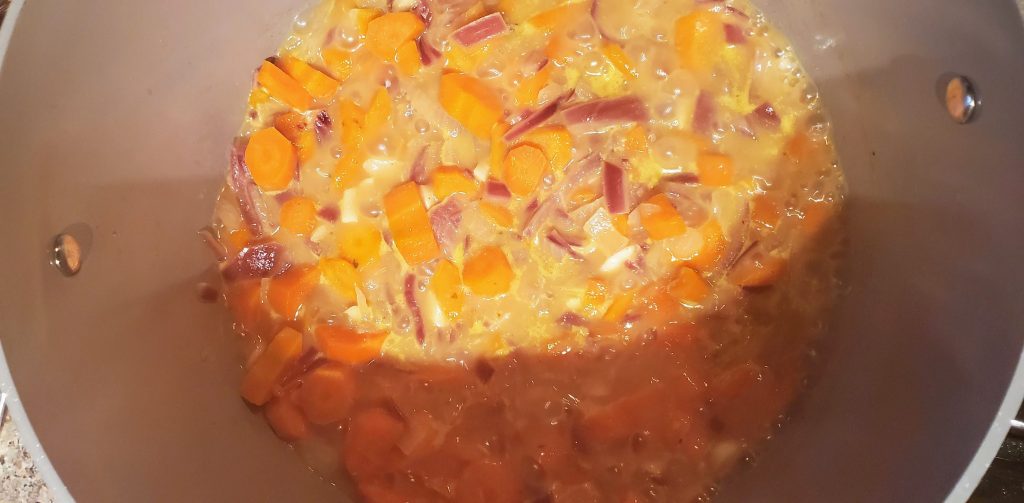
But why not make a “Spanish” omelet with a “slow-cooked Spanish sauce” inside and out (that couldn’t possibly be repurposed salsa):

Plant-based "Spanish Omelet"
Plant-based “Spanish Omelet” with plant-based sour cream.

Or, my first attempt, when I didn’t cover the pan to cook and things fell apart, so I just called them “Scrambled Eggs with Veggies”:

Plant-based Scrambled Eggs (and veggies)
Plant-based scrambled eggs with veggies.

I just ate, but posting these pictures of these omelets is making me hungry again!

The key here for me was to use a non-stick skillet, make sure to cover the pan for a minute or two for cooking, stir and/or flip, then cover again. I found that if I did the first flip, it was a good time to add vegan cheese, which allowed it to melt, covered again. While I’ve been lazy lately, and haven’t made my Plant-based Sharp Cheddar Cheese, I did have some of my Plant-based Sour Cream to use on these! Combined with a few olives, green peppers or green chilis, and some slice olives, and they’re quite a treat!

Try this plant-based scrambled egg and omelet recipe from the Minimalist Baker for yourself! I’ve removed the unneeded oil from this recipe, as well!

Plant-based Scrambled Egg and Omelet Mix

A egg, or even "Just Egg" alternative you can make at home, from mung beans, and 8 other real, wholesome ingredients. Perfect for scrambles, omelets, frittatas, and more!
Prep Time6 hours 10 minutes
Cook Time5 minutes
Course: Breakfast, Breakfast, Eggs
Cuisine: American
Keyword: egg substitute, eggs
Servings: 6
Author: Minimalist Baker

Ingredients

  • 3/4 cup split mung beans, rinsed (moong dal) NOT whole mung beans
  • 1 to 1 1/4 tsp black salt (kala namak) or sea salt — though black salt adds a magically “eggy” flavor
  • 1/2 tsp onion powder
  • 3/4 tsp ground turmeric
  • 2 tsp nutritional yeast
  • 1 ⅓ cup canned light coconut milk
  • 1/4 cup white rice flour or brown rice flour
  • 1 ¼ tsp baking powder

Instructions

  • Rinse mung beans and add to a large mixing bowl. Cover with lukewarm water and soak (covered) for at least 6 hours or overnight.
  • Drain and rinse well, then add to a high-speed blender. Add remaining ingredients and blend until creamy and smooth, about 1-2 minutes. Taste and adjust flavor as needed, adding more black salt for “eggy” flavor, onion powder for overall flavor, turmeric for color, or nutritional yeast for cheesy flavor. The batter should be thin and pourable, but not too watery. Add more rice flour if too thin or more coconut milk if too thick.
  • Heat a non-stick pan or a greased skillet over medium-low heat. Once hot, add about 1/4 cup (60 g) egg mixture, or enough to almost reach the edges of the pan. Then cover.
  • Cook for 1-2 minutes, or until the edges appear a little dry. You may notice bubbles on the surface. Then use a rubber spatula to gently push the “eggs” around toward one side of the pan, or flip, for an omelet. Cover again and cook for another 1-2 minutes.
  • Transfer egg to a plate and let cool slightly. Taste test cooked egg and adjust flavor of remaining batter as needed, adding more black salt for “eggy” flavor or to hide any flavor of baking powder.
  • Continue process until all of the egg mixture is cooked! Alternatively, store in the refrigerator up to 1 week for use throughout the week.
  • Serve as is, or with desired toppings, such as salsa, vegan parmesan cheese, fresh herbs, or toast.

Notes

PBB: I successfully used:
  • Peeled Mung Beans, instead of split mung beans
  • Tapioca flour, instead of rice flour (adding a little extra, for my attempt)
  • Full premium cocunut milk thinned with just a bit of water, instead of light coconut milk.

The next batch of this stuff that I make, I’ll have to save some in the refrigerator for later in the week! I’d even saved the bottle from the Just Egg that I purchased, so I’ll have the perfect bottle to keep this in, at a mere fraction of the price!

PBB
Cheesy Brocolli Rice Cream Soup

Cheesy Broccoli Rice Cream Soup

The winter days are waning, and it’s heating up, but there’s still just enough time for a little more comfort food – soup!

After last week’s Broccoli Chocolate Cake, I still had some broccoli left, and, I remembered that, when I was growing up, my mom used to make a delicious broccoli rice soup! Mom’s soup was undoubtedly made with dairy products, so I had to think outside the (dairy) barn!

The result was something I think is truly special, and uses some methods and skills I’ve been honing and learning about from other recipes. And, I’m pleased to say that this recipe is 100% original to the Plant-based Bear, and I’m pretty proud of it!

This soup is chock full of goodness, from whole grain rice, to carrots, onions, and, of course, broccoli!

Cheesy Brocolli Rice Cream Soup with Cashew Cream
This bowl of soup was the first I ever made while inventing this recipe, and “stirs in” the cashew cream at the end!

First, I start off with a little coconut milk, some water and several cups of veggies, like carrots, onions, and some garlic, along with just a bit of seasoning to get things going!

Carrots and onions simmer.
Carrots, onions and garlic simmer in just a little bit of coconut milk and water! I used red onions in this batch, and it simply darkens the color a bit!

Once most of the liquid has boiled off, I add a bit of vinegar, just for a bit of zest and to kind of “pickle” the ingredients. I add in a bit more water, a little more flavor, and two cups of cooked rice. Then, this soup base heads to the high-speed blender to turn creamy!

While blending, I heat up some more water, and add in everything else! And while I wait for everything to get nice and warm, I can whip up some cashew cream!

Cheesy Brocolli Rice Cream Soup
Even without cashew cream, the Plant-based Bear’s Cheesy Broccoli Rice Cream Soup is delicious!

Cheesy Broccoli Rice Cream Soup

A ridiculously creamy, whole-grain, healthy vegetable delicious hot treat!
Last updated April 20, 2020.
Prep Time20 minutes
Cook Time40 minutes
Raw cashew soaking time1 hour
Total Time1 hour
Course: Soup
Cuisine: American
Keyword: brocolli, cashew cream, Cheese, rice, soup
Servings: 8
Author: Plant-based Bear

Ingredients

Vegetable Cooking

  • ½ cup coconut milk
  • 1 ½ cups water
  • 2 cups carrots peeled and rough chopped. Roughly 4-5 medium carrots.
  • 2 cups onions rough chopped. About 1 medium-large yellow or white onion.
  • 2 to 4 cloves garlic minced or chopped
  • 1 ½ Tbsp McKay's "Chicken" Seasoning
  • ½ to 1 tsp ground cumin
  • 2 tsp white vinegar

Soup Base

  • 1 to 2 cups water
  • ½ cup nutritional yeast flakes
  • 2 cups rice cooked

Main Soup Ingredients

  • 3-4 cups water
  • 2 Tbsp corn starch
  • 3-4 cups rice cooked
  • 1 tsp seasoned salt optional or season as desired
  • tsp cayenne scant, optional or season as desired
  • tsp ground pepper scant, optional or season as desired
  • 3 cups broccoli lightly steamed, medium-fine chopped.
  • 1-2 Tbsp lemon juice season as desired, see notes.

Cashew Cream (Optional)

  • 1 cup raw cashews soaked overnight, or in boiling water for an hour
  • ¾ cup water

Instructions

Vegetable Cooking

  • In a large non-stick soup pan, add coconut milk, 1 1/2 cups water, carrots, onions, garlic, chicken seasoning, and ground cumin.
  • Cook on medium high, stirring occasionally, until liquid is almost gone.
  • Stir more frequently to cook the carrots and onions a bit more until almost dry.
  • Add vinegar, stir and cook that mostly off.

Soup Base

  • To the cooked vegetables, add 1 cup water. nutritional yeast and 2 lightly packed cups of cooked rice.
  • Stir until rice is separated, and everything is well-mixed.
  • Add entire mixture to high-speed blender.

Main Soup Ingredients

  • Before worrying about blending, return empty soup pan to stove, on high, add 3 cups cold water, and 2 Tbsp cornstarch. Mix well.
  • Blend the soup base in the high-speed blender until very creamy and smooth. If you have trouble blending, add water, 1/4 cup at a time until it easily blends, but remains thick. This may take a couple of minutes.
  • Back at the soup pan, the water should have heated to near boiling. Add 3 cups cooked rice and stir to separate.
  • Add seasoned salt, cayenne, and pepper.
  • Return soup base from blender to soup pan and stir in.
  • Add broccoli and lemon juice.
  • Season as desired.
  • Serve and enjoy. Store leftovers in a tightly covered container.

Cashew Cream (Optional)

  • To take this delicious soup from delicious to decadent, make and add some cashew cream!
  • In a high-speed blender (you don't really have to wash/scrape it out that well from the soup base), blend soaked cashews and water on high until you have a beautiful cream.
  • Stir cashew cream into the entire soup and mix, or use it to swirl into each bowlful!

Notes

2 cups of precooked rice is more than enough for this whole recipe.  Extra rice can be added for desired consistency.
Remember that cheese is often salty, so using a little extra chicken seasoning, seasoned salt, or salt-substitute than you normally might, will help add to the cheesiness!
The full amount or additional lemon juice can give things a lovely tang that works well for a cheesy taste!  More lemon juice may increase the “sharpness” of the “cheese.”
Water can be adjusted to suit the level of “soupy-ness” you require.  This soup will get thicker as it sits.  Use more water, if also using the cashew cream.
Cashew cream is completely optional, but does take this soup from delicious, to decadent!  You can just add the cream to the soup pan and stir in, or swirl in some into each bowl of soup as you prepare to serve.  If storing leftovers, cashew cream is properly best stirred into the remaining soup!

I hope this original Plant-based Bear recipe will become one that you truly enjoy. Or, if you have tips or comments, please pop them below! May your remaining winter evenings be full of something creamy, cheesy, soupy, and delicious!

PBB
No-Oil Air Fryer Country Potatoes

No-Oil Air Fryer Country Potatoes (Again!)

Lately, these breakfast potatoes have really hit the spot for me, and I find myself making them several times a week! Today I went all out and took a picture for you!

If you haven’t already, head on over to my No-Oil Air Fryer Country Potatoes how-to, and whip yourself up a batch!

No-Oil Air Fryer Country Potatoes
Today’s version!
PBB