No-Oil Hummus (Among Us!)

No-Oil Hummus (Among Us!)

It’ll definitely take me longer to write this recipe out for you than it did for me to whip up my latest batch of hummus in my high speed blender! Since I’ve become plant-based, I’ve made sure to have plenty of healthy snacks available, just in case I get the munchies, and to help me stay true to my ideals! So, I usually have lots of fresh fruits, frozen fruits (frozen blueberries make an amazing cold snack), raisins (that aren’t soaked in sunflower oil), and, well, hummus! I’ve bought hummus in bulk for years from Costco, but, upon inspection, it’s filled with oils and sometimes other ingredients I can’t pronounce.

So, I’ve started making my own, because it really is so easy, there’s a billion variations, and, it’s pretty cheap, too! I’ve started taking my hummus to parties and events, along with a big bowl of sliced and diced veggies, and it’s been a big hit! In fact, I’m starting to get a little bit known for it!

No-Oil Hummus (Among Us!)
Fresh No-Oil Hummus (Among Us!)

First off, I’m not picky on my chick peas or garbanzos. I’ve tried at least a dozen brands, and I’ve not seen that it makes any difference. So, now I buy canned garbanzos in bulk from Wal-Mart, which usually has a can for under $0.50 or at another local grocery store that is having a sale. I’ve also tried to take dried garbanzos and soak and cook, but I haven’t yet perfected that, and, it makes a simple tasks take hours, although I like the thrifty ideal!

No-Oil Hummus (Among Us!)
Hummus on a home-made No-Oil Corn Chip.

And, while not going to go too deep into it right now, don’t throw away that “bean juice” or “aquafaba” that isn’t needed in the recipe. You can use it in my No-Oil Whole Wheat Bread recipe and host of other things, and it makes a great substitute for eggs in certain other recipes and such. Simply freeze a jar of it, and it’ll last forever. (In fact, one of my former plastic 32 oz. jars of tahini has been repurposed into the aquqfaba freezer jar!)

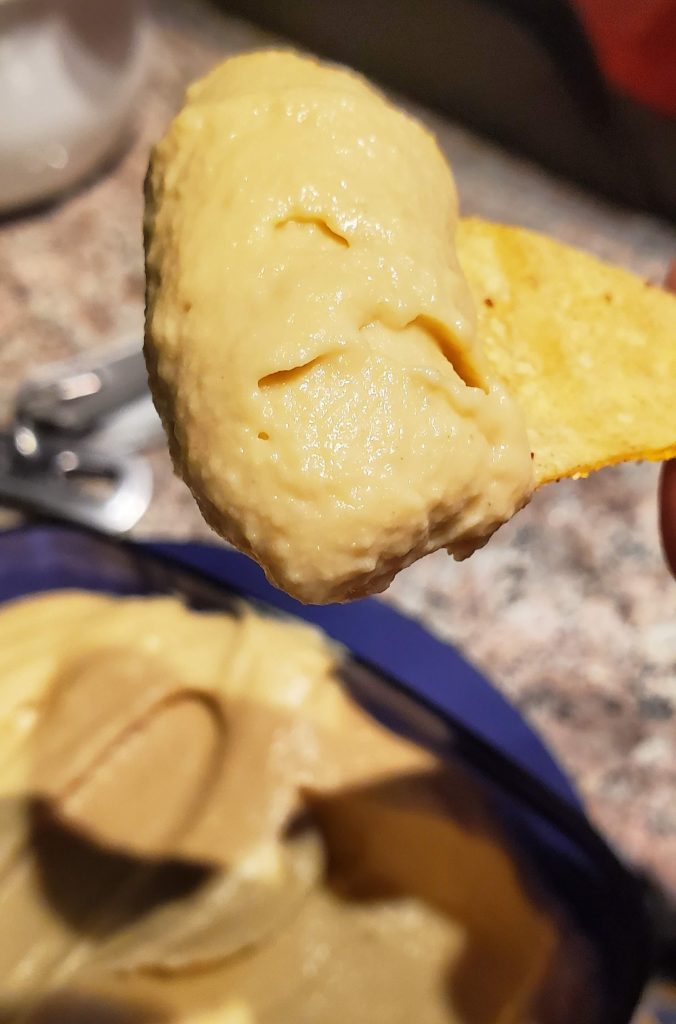
Hummus is also great for so many things, other than basic “dip” snacking. I’ll often use it as a “mayo” or spread for bread, sandwiches, on salads as a dressing, and more!

So, without further ado:

No-Oil Hummus (Among Us!)

The Plant-based Bear's take on a classic, creamy, and smooth Middle Eastern dip!
Last updated Oct. 11, 2019.
Prep Time20 minutes
Course: Appetizer, Dip, Sauce/Spread
Cuisine: Greek, Lebanese, Middle Eastern
Author: Plant-based Bear

Ingredients

  • 2 15 oz. cans garbanzo beans or chick peas
  • 4-5 Tbsps sesame tahini see notes
  • 8-10 Tbsps lemon juice fresh, if possible
  • 4 cloves garlic adjust to preference
  • 1 to 1 ½ tsp salt
  • 1 tsp cumin heaping
  • ½ tsp chili powder
  • 1 tsp Frank's RedHot Seasoning Blend Powder heaping

Instructions

  • Open one can of garbanzo beans, drain and add to blender. Save aquafaba (bean juice) for later on, or other recipes. Just don't waste it!
  • Open 2nd can of garbanzo beans, drain about half (or more) of the liquid, and add to blender. See notes at bottom before you pour it all in!
  • Add 4 generous tablespoons of tahini to blender.
  • Add lemon juice to blender. Yes, 8-10 tablespoons is a lot of lemon juice! If squeezed fresh, you might use closer to 8. Bottled, closer to 10. Even more than 10 is okay, but might make hummus get more runny, so you can decrease the aquafaba in the recipe.
  • Add all other ingredients to blender.
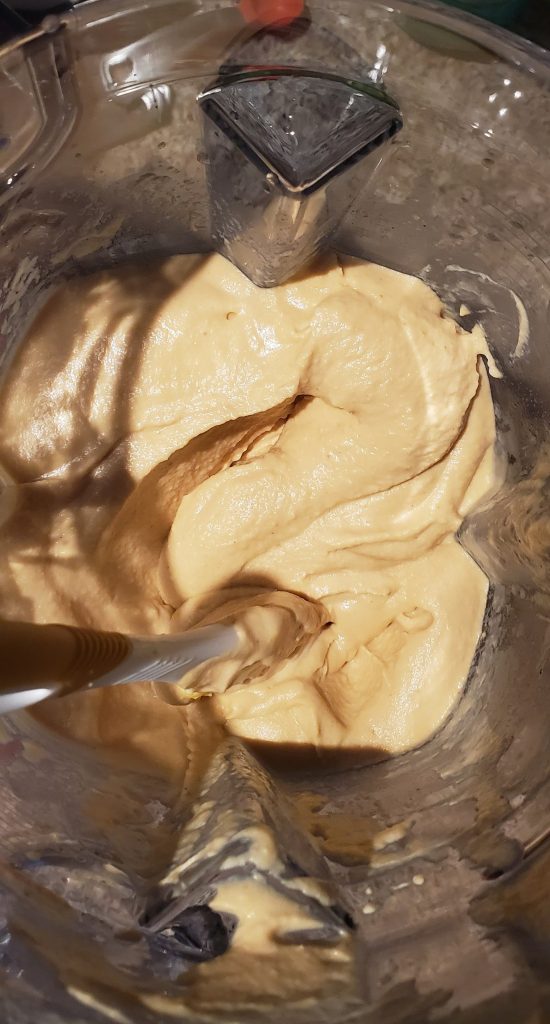
  • Blend until smooth.
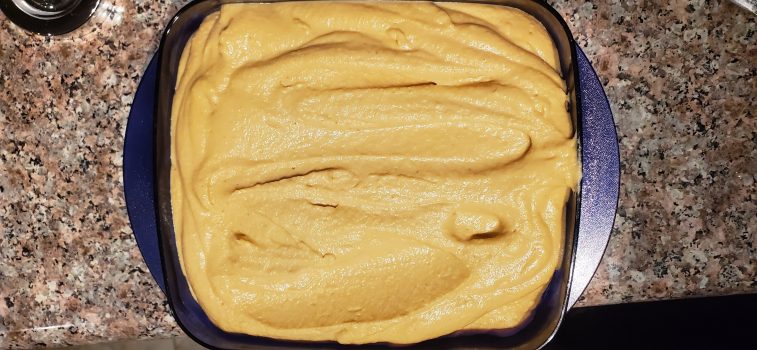
  • Pour into airtight storage container and chill before serving. (Although some warm pita bread and fresh-made warm hummus is kind of amazing, too! Just don't eat it all at once!)

Notes

Lemon juice really gives a great flavor to hummus, so if you’re worried about it getting too runny, it’s better to decrease the amount of aquafaba you’re using than to decrease the lemon juice.  Starting out with very little liquid other than the lemon juice, and adding just enough aquafaba to make it blend is a good method! And, in my opinion, it’s almost impossible to have too much lemon juice!
Get tahini at an international market and look for the jars that have as little English as possible on them. Look for “100% sesame seeds” and nothing else. Tahini, once initially stirred, should be a thick, runny liquid, not a paste.
No-Oil Hummus (Among Us!)
Freshly blended No-Oil Hummus (Among Us!)

The heaping tablespoons mentioned in my recipe just mean that I wouldn’t be stingy with the ingredients. I think you CAN overdo things like the chili powder, and even though I like garlic, 6-8 cloves is really too much! Other than that, season to your personal taste.

And then there’s Frank’s RedHot Seasoning Blend! I picked up a large jar of this one day at Costco on a close-out, and when I thought to try it in my hummus, I’ve never looked back. It really is perfect for hummus, giving it just a little zip that it needs, without making it “spicy.” You could also put a pinch of cayenne or increase the chili powder slightly, but Frank’s really does something nice to it!

Frank's RedHot Seasoning Blend
Frank’s RedHot Seasoning Blend adds the perfect bit of zip, without getting too spicy.

Finally, this is a basic recipe. I almost never make my hummus exactly like the recipe, unless I’m taking it to a party! Lots of things can be added to bring originality and a new take, such as: bell peppers, olives (green, black, and kalamata all make it amazing), fresh parsley, fresh mint, fresh cilantro, jalapenos, banana peppers, green chilies, and more. For most of these extra ingredients, I’ll blend my hummus to completion, then add my extras, blending just briefly to break them up, without pulverizing! One extra note about bell peppers: green or red give some color, but peppers are largely water-based, so might make your hummus slightly more runny. You might decrease the aquafaba in your batch at the beginning, first!

PBB
Dehydrating Bananas

Dehydrated (drying) fruit!

Dehydrating or drying your own fruit is a great way to make a healthy, desirable snack, that’s pretty much guilt-free, and totally plant-based!

Skip to the How-tos for Bananas or Apples below, if you wish!

Back on Amazon Prime Day this year, I picked up a super cheap food dehydrator! Because of various discounts, coupons and such, I got it well under $20 (although now about $40), and I figured this was a decent way to decide whether it’d be something I’ll use long-term or not, without putting out much cash.

Back in the day when I was a kid, we walked uphill both ways to school my parents had gotten into food dehydrating, due to the abundance of produce we grew in our own yard, and sometimes hitting super cheap sales of things. So I remember hours spent getting the bananas, apples, prunes, and such dried. We even made our own fruit leathers and such, which is awesome, but my dehydrator doesn’t have fruit leather tray inserts.

Well, I don’t have a yard, don’t grow anything except a couple of houseplants I manage to keep alive, and well, real sales can be few and far between. And things like dried apples are easy to come by at the store, and actually pretty cheap. But, it’s not the same. So when I see a sale on something, I bring some home and slap them into my cheapy dehydrator.

Now, before I get too far, although I’ve linked the dehydrator I got (and who knows, I might get a penny if you clicked through to buy…) I don’t think I can really recommend it if you plan to get serious about food drying. It was super cheap for me, but the full price of $40 is a lot for it, and people have mentioned its many downfalls, such as no temperature adjustment, timer, and apparently flimsy trays. I’ve used mine at least a dozen times without issue, but, your mileage may vary! I may end up inheriting the old setup from when I was a kid at some point, or look into something better if/when I wear this thing out. For more information, check out this or this, for people who have evaluated them much more carefully than me, or heck, do you own Web search. People seem to love the Nesco and Excalibur dehydrators, unless you get super fancy.

One of the thing I miss are “banana chips”, which people may think of as dried bananas, but are actually deep fried and sugar or honey coated bananas. But here at the Plant-based Bear, we’re trying to do without oil. So, I guess we have to make our own! A local grocery store had a one-day sale on bananas for 5 lbs for $1, so I got about 15 lbs!

The How-to Guide for Drying Bananas:

Dydrated Bananas
My dehydrated bananas, stored in an air-tight container.

Bananas are super simple to dry:

  • Peel and slice ripe bananas into about 3/8 inch slices. Thinner works too.
  • Pre-treat banana slices by coating with pineapple, orange, or lemon juice.
  • Spread onto dryer trays, making sure most juice has been left behind. Bananas slices can touch, but shouldn’t overlap.
  • Dry until very leathery or hard and crispy.

Good and ripe (but not spoiling) bananas work best. Green bananas will dry much more quickly, but have a grainy, almost powdery dry texture and almost no flavor, so are a complete waste (although don’t brown as much.)

You can cut your bananas thinner for a quicker dry time, but they’re kind of hard to peel off the dryer trays, and I don’t like the texture; but, too thick, and it’ll take forever for them to dry.

I simply cut my bananas up into a bowl of pineapple juice and then use my hands to grab handfuls of the bananas and spread on the trays, “straining” with my fingers. I use the pineapple juice because I think the flavor pairs well, but a decent orange juice or lemon juice will also have the effect of helping the bananas brown less, the purpose of the pre-treating. Of course, they will STILL brown…

Then, for my dryer, it takes about 24 hours for them to properly dry. You don’t want too much rubbery or squishy feeling in them, erring on the side of crisp to figure out when they’re done, for longer storage.

My food dehydrator apparently warms to about 135 degrees and is not variable. However, temps from 125 to 135 degrees F seems ideal for bananas, from what I can read online.

If you’ve managed to get all of the moisture out, these dried bananas will last in an airtight container for a VERY long time. If you don’t dry them enough, you can get mold, so again, err on the side of dryer and crispier. Of course, they may not last long as your house anyway, because I bet you’ll love them!

Dehydrating Apples

The How-to Guide for Drying Apples:

Apples are even easier than bananas, as they don’t require pre-treatment for browning. I’ve tried it both ways, dunking my apple slices in pineapple juice, and doing it without, and the difference in the final product is almost indistinguishable, so why bother?

  • Wash and dry apples. Cut out any bad or questionable sections.
  • Peel apples, if desired.
  • Core, if you have a good way to do that.
  • Using a mandolin, slice apples in about 1/4 to 3/8″ slices.
  • Spread on dryer trays
  • Sprinkle with cinnamon if desired.
  • Dehydrate!

You don’t want to think of using spoiling or super green fruit for dehydrating. Garbage in, garbage out, so use an apple you’d actually want to eat, not mushy, not hard green.

I don’t have much success coring my whole apples, so I slice first, and then cut out the middle, as needed. A bottle cap, or something of that nature works good for me for this, or even just a paring knife on the cutting board. You may have another kind of kitchen tool that you can use for this.

Some people seem to think it’s lazy to leave the peels on, but I kind of like the look, and the peels don’t bother me, so I leave them on. I’ve found that gala or fuji apples, or some of the other, non-red-delicious apples work best, but red delicious works fine, too.

For slicing, using a mandolin. Don’t think you can slice with a knife. You “COULD” slice with a knife, but you want a very even, consistence slice, so they dry at similar rates and you have a uniform appearance. I’ve chosen the mandolin to link that I have, because it has that nice container it sits on top of, and good ratings. The old mandolin that I use has to be propped against a bowl or something, otherwise you ruin the slices. If I was buying one, I’d get the one designed with the holding container.

I’ve tried with and without cinnamon, but usually forget to add it. Either way, the slices are amazing. Dry until almost brittle or very leathery. Again, if stored in an airtight container, they should last forever if you’ve properly dried them enough, but too much moisture left in them will cause mold at some point. In my dryer, it takes about 12 hours, or overnight. Apparently, about 130 degrees F is ideal for drying apples.

Dehydrated Apples
I simply store my dried apples in a plastic bag!
The darker black peels are red delicious apples.

Now get snacking!

PBB

Preparing for the weekend

Today was a super busy day for making some essentials for the weekend. I knew I wanted some sour cream, hummus, cheese, and mayo. I also wanted fresh bread (one loaf as a gift) and some butter!

So, I started the night before, putting two bowls of raw cashews and water in the refrigerator, one with just a cup of cashews, and another with 1.5 cups.

Then, starting early in the morning, I got busy. I was so busy making, that I didn’t really take photos, unfortunately. But, if you’d like to know about these kind of “staples” that I use, keep reading!

Plant-based Butter:

I haven’t tried any other butter recipes, because I’m just so happy with one I got from the “Seven Secrets Cookbook“. This butter is just cornmeal cooked with coconut milk, a bit of water, and salt. Then you blend it all together in a high speed blender and pour it into your butter dish, and it hardens in the fridge! I can’t find a similar recipe online, but maybe sometime I’ll post it. By the way, there are tons of great recipes in the Seven Secrets Cookbook. Grab yourself a copy!

I make this butter about every week and a half or so, and find that a double recipe really works best in my blender. You can freeze it, but it’s not awesome thawed. Otherwise, it’s just like butter for me, and incredible on fresh-baked whole wheat bread, or sourdough.

Plant-based Mayo:

For the mayo, I used that 1 cup of raw cashews I’d been soaking, and Shannon’s “Yup, It’s Veganoil-free mayo recipe. The only thing I change in this recipe that I’ve used several times is to not add that much, or any, sweetener, in this case agave nectar. I just think it makes the mayo too sweet, and that isn’t savory, to me! This recipe will also help you use some of that aquafaba!

Plant-Based Sour Cream:

The other 1.5 cups of soaked raw cashews was for the sour cream. This time I used Angela’s Cashew Sour Cream recipe from OhSheGlows.com. Most of these sour cream recipes are similar, and there is a good one in the Seven Secrets Cookbook, too. But, this one is pretty great. The only thing I change is the apple cider vinegar and lemon juice. I like just a regular white vinegar, because otherwise, the sour cream tastes sweet to me, not sour (especially the longer it sits.) I added a bit more lemon juice too, as I really want my sour cream to be sour!

No-Oil Whole Wheat Bread

No-Oil Whole Wheat Bread:

In my No-Oil Whole Wheat Bread recipe adaptation, I’d previously suggested that vital wheat gluten is optional, but I’ve changed my tune. It really gives the bread the ability to bend and not break, and makes less crumbs. So I highly recommend it. The recipe has been updated! (And, I’ve since updated it to 2 Tablespoons of vital wheat gluten!) I baked up two loaves in the evening after work, and they turned out great as usual. I feel very lucky that only my first attempt at bread never did really work!

Hummus (Among Us):

Hummus is already plant-based, so find your favorite recipe and use it! Seven Secrets Cookbook has one, and most all of them are based on the same theme. I tried to triple the recipe, and actually burnt out my blender, at least for a few minutes until the fuse reset. Hummus goes quickly at my house! One recipe I like is Hummus In The Blender from Susan at FatFreeVegan.com. Just leave out that added olive oil, as it’s completely unnecessary, and just added fat. Or, now check out my No-Oil Hummus (Among Us!) recipe that’s just been added!

Vegan Sharp Cheddar Cheese

Plant-based Cheddar Cheese:

This one takes just a little more time, but I again went with the Plant-Based Sharp Cheddar Cheese, and doubled the recipe. As usual, this came out great, and I had 6 tiny loaves of cheese ready to go!

So, now my weekend was ready, and I wouldn’t have to make any of the staples that I’d want!

PBB